Entries Tagged as 'Halloween'

Indy Haunt Fest June 26, 27

Indy Haunt Fest is June 26, 27 in Indianapolis. Mrs. Spookyblue and I will be there, along with whatever mustering of monsters we can fit into the truck.

The lineup includes a haunter’s auction, hearse rally, zombie crawl, make-and-take classes, and presentations by haunt pros such as Haunted Attraction Magazine co-founder, and commercial haunt designer, Leonard Pickel.

Your old pal Spook will give a “Monster Mache” demonstration, and we’re also hosting a foam carving make-and-take. This hands-on covers old school methods that don’t involve searing hot wires, killer fumes, and accidentally setting your shoelaces on fire.
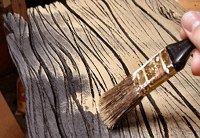
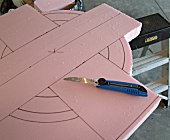
Folks can choose to make a 10″x12″ tombstone, or a “rotted wood” sign (about 14″x10″).

We’ve had to miniaturize things just a bit to fit into the time allowed, but the techniques can be scaled to any size. When the carving’s done, we’ll paint our projects to look like real wood, brick, or stone.

Class size is limited, so if you’re interested in attending, contact us for more info, or to reserve a spot.

Spookyblue’s Foam Carving Make-and-take at Indy Haunt Fest

  • $10 per person. (Cash at the door. Event admission not included.)
  • All materials and tools provided.
  • Participants 17 and under must be accompanied by an adult.
  • We’ll be having lots of fun with paint, too, so wear appropriate clothing.

If you can’t make the class, then stop by our booth for a visit. Meet The Grumble. We’ll have spider rings.

Indy Haunt Fest official website

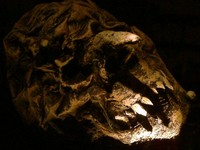
The funny thing about imploding witch heads

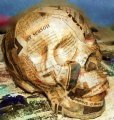
Spookyblue Witch ProjectI had been experimenting, some time ago, with Great Stuff as a filler material for paper skulls. (Never give up on a bad idea.) Great Stuff, for the uninitiated, is expanding, sometimes evil, foam in a can.

To summarize, I used too much, too fast, and it expanded unevenly during the curing process. My experimental skulls collapsed as the sticky ooze did weird things, and I was left with some very scrunched up faces.

Witches, happily, often appear to have scrunched up faces. >ding!< Thus began our Witch Project.


Special thanks go out to the folks who encouraged, prodded, plagued, heckled, and otherwise nagged your old pal Spook into finally finishing the ‘Witch Project’. You know who you are. :)

Zombie Classifieds

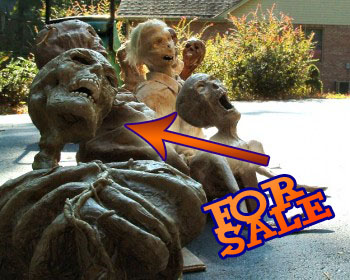
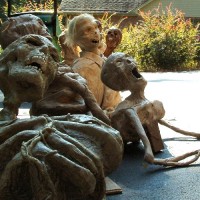
Zombie For SaleWould you like to have more friends, or even just one? Someone who will appreciate the time and meticulous detail you’ve invested in your authentic Starfleet Admiral’s uniform? Got a cat that needs a worthy staring opponent?
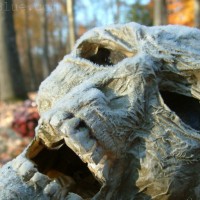
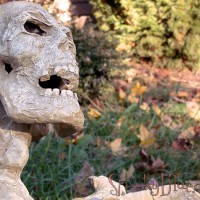
In an ongoing effort to clear space and make some extra glue money, I just got the repair bill for the old rattletrap (Ignition coils cost how much?). So, we offer up for sale this first generation pre-owned groundbreaker zombie.

« SALE PENDING »

Ivan OdorIvan OdorIvan OdorIvan Odor

Ivan OdorIvan OdorIvan Odor

Description:

  • Built in 2006, this zombie skeleton critter has appeared in the Spooky Hollow outdoor haunt display for three years.
  • (Basically) rugged paper mache construction was sealed against the elements (sort of) in ’06, which means that he never got any soggier than our other graveyard monsters.
  • Sturdy wood base, no hands (Look, ma!), and original rust dresses up the coat hanger bits protruding from his wrists. (Tetanus booster shot is recommended)

Physical Dimensions:

  • Beats me. About what you would expect, I suppose. I’ve never measured him. Details .. details.

Desirable features:

  • Recumbent body style.
  • Some cracked/broken arm bones, and loose, in-need-of-repair “stringy sinewy stuff” add to the quality of the overall decay.
  • Original graveyard patina (Dirt – lots of that).
  • Smells like a potato.

Price:

  • $135 $100 $95 $79.50 + Shipping (as is). Make Offer
  • Refurb service available.
  • Estimated shipping: No idea. Any overage will be refunded.

How do I buy this … thing?

  • We’re taking the quick and dirty approach, so no fancy “Buy Now!” buttons at the moment. Contact Us Via Email.

Payment Methods:

  • After a final agreement has been reached …
  • Google Checkout, or
  • Money order.

Return Policy:

  • Fuggedaboudit.

Seriously? Sounds like a hunk of junk to me.

  • Never trust a travelling zombie salesman.

Paper Mache Skull Questions

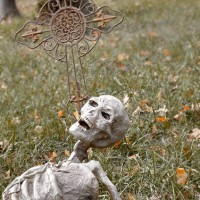
Your old pal Spook gets a lot of mail from folks who, having tried their hand at making a paper mache skull, can’t seem to de-mold the copy without tearing it, poking holes, or jamming a screwdriver under a thumbnail. This makes for a generally unpleasant experience all around.

Frustration is a key ingredient in all sorts of FAIL, to which I attribute some dented trash cans, a collection of snapped dowel rods, and half a dozen tool-shaped holes in the walls of my garage. The following note on the subject, recently hurled in our direction, is … illustrative.

“you need to give alot more info on your paper skull instructions. this method doesn’t work…you can’t get the paper off the skull afterward which ruins it, and the paper doesn’t even remotely resemble a real skull. either you’re leaving out some important steps/tips, or else this is just a big waste of time & cash.”

Hm. Vinegar, mixed with a little oil, makes a nice salad dressing. Spray it on your garden, and you’ll wipe out all the tomatoes.

While I’m not inclined to be overly helpful to this person (Grumble wanted to write today’s post), there are other folks who might be experiencing similar issues with their paper mache skulls, so I updated the project page with some further, possibly helpful, tips.

  • Use a release agent like WD40, wax, spray silicone, or anything slippery that won’t melt your skull and burn the skin off your fingers. (Ask a classical guitarist to play any AC/DC song for a good visual of what I mean.)
  • Use a very thin glue for the first paper layer, or try just water and no glue at all.
  • Apply several paper layers, or your copy won’t be strong enough to survive de-molding. You can add up to three layers in one session. A fan helps with drying. Feel free to apply more layers, but allow ealier layers to dry first.
  • Pay special attention to the eye sockets and nose cavity. Overlap long, thin strips, adding extra coverage from the center out to eye ridges, cheek bones, etc.
  • Don’t try to de-mold until the copy is completely dry.
  • Slice your copy into three pieces, or try a different pattern if mine has not been successful for you.
  • Break the seal around the base of the skull and jaw bone by carefully prying, or cutting, the paper edge from the form. Work slowly, and go all the way around.
  • Slip a small flat-tip screwdriver or butter knife under an edge and carefully work it around to peel the paper from the form. Concentrate on one area until it lifts away.

We enjoy corresponding with all haunters. If you have a story to share, a question for the team, or would like to offer constructive criticism, the Undead Letter Office is open 24-7. All other correspondence is subject to our Grumble Filter.