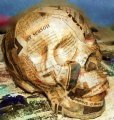
- Resin skull from Anatomical Chart Company
What?! Spend $25 on a skull? Hear me out. A good quality resin skull will last indefinitely and its copies will look exceptionally good. You can make open or close-mouthed copies, and Elmer's glue doesn't stick very well to it so it's easier to peel.
I recommend the "Budget Two-Piece Skull" with intact, uncut calvarium. It's just easier. However, you can shave off about $10 and get the "Budget Life-Size Skull (4th Quality)" for less. The downside is keeping track of the cut calvarium. Those damn things are constantly trying to escape. I saw one emptying dirt from one of its pants legs in the driveway the other day.
A relatively recent third option has become available. Skeleton-Factory.comsells a "Budget Two-Piece Skull" for $15.95 that appears to be identical to ATC's. In fact, most of the lower-cost items ATC sells are also listed at Skeleton-Factory. We don't know anything about these guys, but they're definitely worth a look. - Modeling Clay
Any modeling clay will work, though I prefer Plasticine. It won't dry out and it's easy to work with. - Newspaper, Elmer's glue
- Expanding foam (optional)
- Release agent - WD40, spray wax, or silicone spray (Optional) *
Materials List
Step 1 - Fill in the blanks
![]() Press modeling clay into large voids like the nasal cavity and the backs of the eye sockets. Wad up some newspaper and stuff into the open areas on either side of the skull where the jaw springs are mounted to the head, then cover these with clay. Also press clay into the gaps between the back teeth and the jaw. You don't have to fill in every undercut and crevice. We're just trying to make it a little easier when it comes time to apply the newspaper strips.
Press modeling clay into large voids like the nasal cavity and the backs of the eye sockets. Wad up some newspaper and stuff into the open areas on either side of the skull where the jaw springs are mounted to the head, then cover these with clay. Also press clay into the gaps between the back teeth and the jaw. You don't have to fill in every undercut and crevice. We're just trying to make it a little easier when it comes time to apply the newspaper strips.
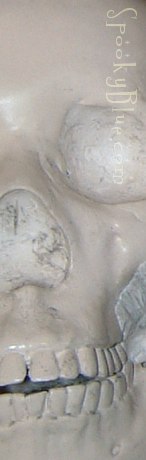
If your skull copy wants a terrible gaping mouth, press clay in between the molars to hold the jaw open. Don't worry about working the underside of the skull. We'll only be applying strips over the top, sides, and front. If there are a few undercuts, that's okay. When the paper's dry we're going to slice this guy open like a bluegill.

Step 2 - Paper & glue
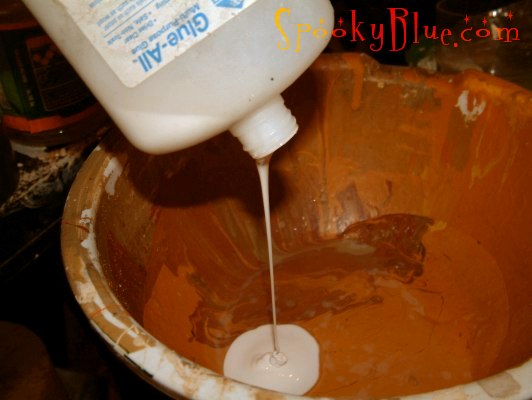
Plain old Elmer's glue has replaced carpet latex as my bonding agent of choice. It dries hard, and it's very durable.
* Update: It is very important that your first layer of paper stick to the skull, but not stick too well. If it adheres like a barnacle, then de-molding will be next to impossible. To combat this, we need glue that is just sticky enough to hold things in place, but will peel easily later.
- Option 1: Mix a small amount of glue (4:1 water to glue). Wet your paper strip with water first, then apply the glue.
- Option 2: Try liquid starch, or even old-fashioned paste (you might have munched this back in elementary school).
- Option 3: Don't apply glue to the first layer. Wet your paper strips with water only. I've tried this, and I'm not fond of it because the paper tends to slip around. Some folks report success. If other alternatives haven't worked for you, then give it a shot.
For the remaining layers of our skull copies, mix one part glue to one part water in a a big plastic bowl. Even better is a big plastic bowl with a snap-on lid so you can save any left over glue mixture. It won't store forever, but it should last a couple of days. Even better than that is a big bowl of popcorn. But it sticks to your fingers when they're all covered with glue.
Next, tear your newspaper to shreds. Make strips that are around 1"-2" wide by 6" long. Don't cut your strips with scissors. The edges don't blend well. Ragged edges are much easier to blend together. If you're having trouble with folds and wrinkles, try tearing your paper into smaller strips. These are easier to smooth, and will actually enhance the overall strength of your copy. It boils down to a matter of time versus return on investment.
Step 3 - Glue fingers together
Dab three fingers into the bowl of glue and apply to one side of a paper strip. Too much glue and it won't stick to the skull. Too little and you'll have trouble smoothing it out.
"Whoa! Wait a minute! No release agent? I just spent a bag of cash on this skull and we're not going to cover it with aluminum foil or plastic wrap or something?"
* Update: Just for kicks, I sprayed a little WD40 onto a paper towel and wiped down the skull prior to applying paper mache. When it came time to pull the paper, it practically fell off the skull. I owe everyone who had trouble pulling their paper an apology. While it's not strictly necessary to use a release agent, I see now how much easier it is when you do. So, on a resin skull, I've determined that a very light coating of WD40 works, but you might also use light wax, or silicone spray.
If you prefer not to use a release agent, Elmer's glue won't stick very well to whatever material this skull is made of. If you dilute your glue a little more (add more water), you'll have even less adhesion. I've pulled paper away from this skull dozens of times now without a release agent. It can be challenging, and If you're still wary, then mix a thinner mixture of 4 parts water to one part glue. See above note in Step 2.
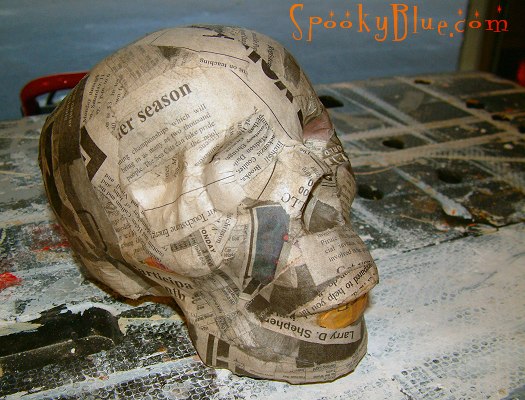
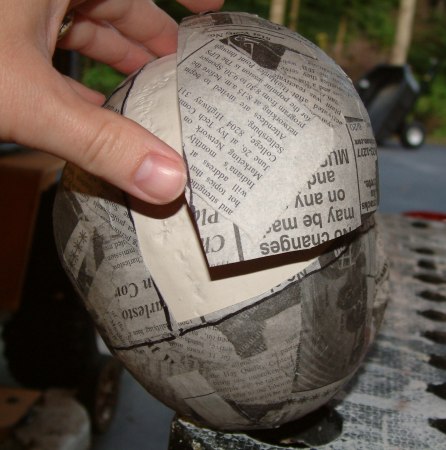
Apply a couple of layers of paper strips. Tear thinner strips if you're having trouble smoothing out the paper. Wrap your strips to just below the jaw line. Don't try to cover the bottom of your skull. Just the sides and the top. If your skull's mouth is open, apply paper to the edge of the teeth. Add a little extra mass to the jaw line to help it keep its shape when it's pulled in the next step. Smooth out any air bubbles and as many wrinkles as you can. When laying down strips, try to criss-cross them so that they help to hold each other in place.
Allow to dry for 6-12 hours.
Step 4 - Peel & pray
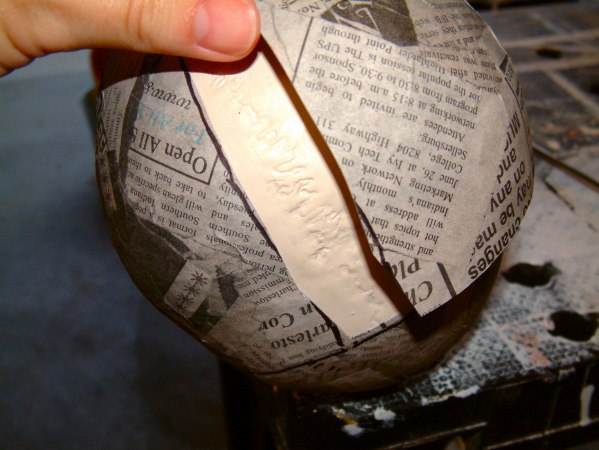
Using a razor blade, make an incision beginning at the center top of the skull and all the way down the back. Next, make another incision on either side of the skull beginning at and perpendicular to the first cut.
Carefully insert a small flat-tip screw driver or a butter knife under any edge and slowly work it around until that edge pulls away from the skull. It might take a little effort, but keep moving around and eventually it will pop off. If you accidentally make a tear or hole, don't sweat it. You can always go back and touch it up with more paper mache.
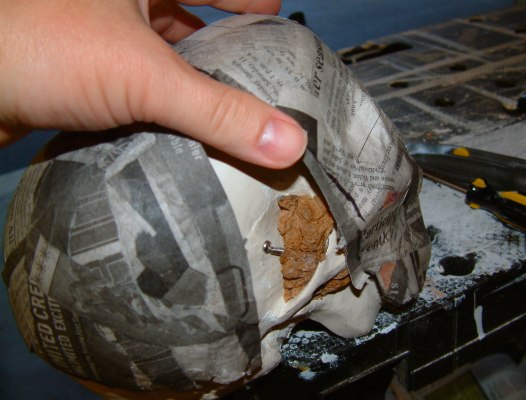 Take particular care when removing paper from the front of the skull. This is where you're likely to run into any snags. Just go slowly and it will eventually pop right off of there.
Notice the exposed paper filling the gap on the side of my skull? Make sure to cover any gap filler with modeling clay. Otherwise your paper mache strips will stick to your gap filler and cause all sorts of problems. If you just can't seem to get the paper off without tearing it, then perhaps your glue mixture was a little thick. Try a thinner mixture.
Just take it slow. When the face finally does pop off, you'll smile. Up until that point you'll probably have a lot of mean things to say about me.
* Update: I get a lot of mail from folks who can't seem to de-mold their copy without tearing it, poking holes, or jamming a screwdriver under a thumbnail. This makes for a generally unpleasant experience all around, so if this has also been your experience, perhaps the following pointers will be helpful:
- Use a release agent like WD40, wax, spray silicone, or anything slippery that won't melt your skull and burn the skin off your fingers. (Ask a classical guitarist to play any AC/DC song for a good visual of what I mean.)
- Use a very thin glue for the first paper layer, or try just water and no glue at all.
- Apply several paper layers, or your copy won't be strong enough to survive de-molding. You can add up to three layers in one session. A fan helps with drying. Feel free to apply more layers, but allow ealier layers to dry first.
- Pay special attention to the eye sockets and nose cavity. Overlap long, thin strips, adding extra coverage from the center out to eye ridges, cheek bones, etc.
- Don't try to de-mold until the copy is completely dry.
- Slice your copy into three pieces, or try a different pattern if mine has not been successful for you.
- Break the seal around the base of the skull and jaw bone by carefully prying, or cutting, the paper edge from the form. Work slowly, and go all the way around.
- Slip a small flat-tip screwdriver or butter knife under an edge and carefully work it around to peel the paper from the form. Concentrate on one area until it lifts away.
Step 5 - Shore it up
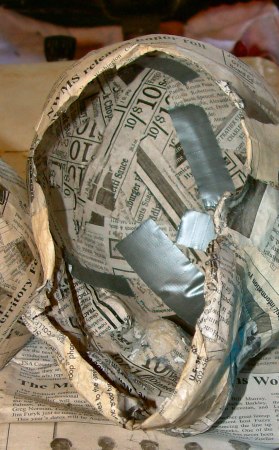
Tape the skull pieces back together by running duct tape along the seams on the inside. Then, if your skull needs a little more strength, add another layer of paper mache. Hold your skull up to the light. Anyplace that you can see through (well, that would be a hole) or lighter areas could probably use an extra layer.
If you covered your skull with the mouth open, add a little extra support around that area. A couple of strips along the inside might help to keep disaster from striking down the road.

Step 6 - Fill your skull with mush
If you're just going to use your skull all by itself, then you're finished. Give him a horrible paint job and you're all set. If you're going to use your skull as part of a prop, then you'll need some way to mount it, right? In that case, you'll want to fill the copy with something.
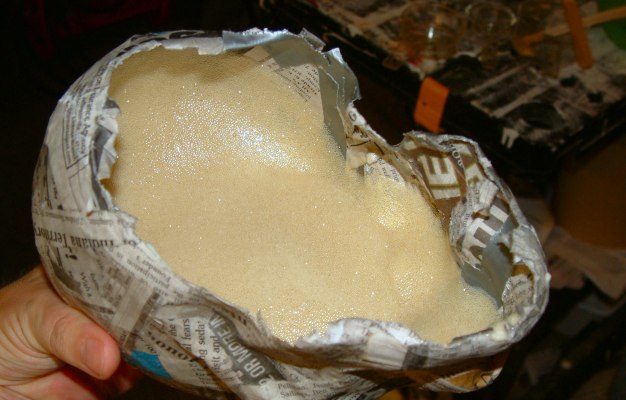
I was lucky enough to have some two-part urethane foam on hand. It's long gone now, but I've been meaning to order more from US Composites. If anyone places an order with these guys, let me know how it went.
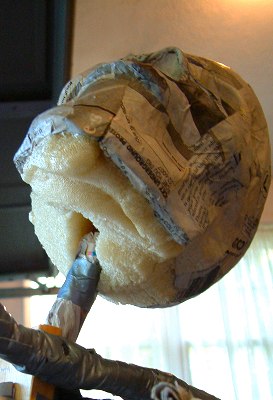
Expanding foam is the superior skull filler. Once it's cured, just gouge or drill a hole for the neck bone. Simple. Effective. But it's freaking expensive, so I experimented with other options.
Great Stuff. Don't. Just don't. That stuff is ... well, it's just not good for this kind of application. So, what do you do when you need to fill your skull, but you don't have any expanding foam?

Step 7 - Finish out
Skin your skull or paint it. Then make sure to seal it before sending it outside to play.
Here is an example of a paper skull mounted on its neck bone, then a little while later...brrr. Creepy zombie. I hope yours are as creepy. If you found this write-up helpful, please let us know! Have fun haunting!