|
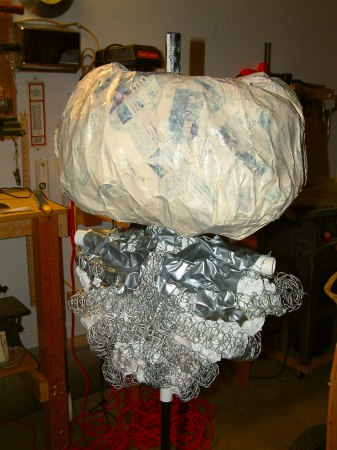
This part of the project will take a long time. I tore newspaper for about 30 minutes before I even opened my gallon of carpet glue. Starting with the head, I put down three layers of newspaper, making sure to give the previous layer plenty of time to dry. In between layers I added bits of duct tape to the torso. I "tied" some of the ribs together to make them more rigid. I also started adding paper to the torso. Same drill. Three layers.
The "neck" area was built up with several layers of paper, then "skinned" like the rest.
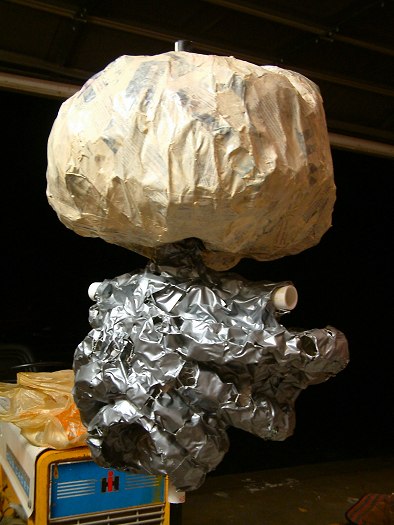
The shape of the head is still pretty crude at this point. That's okay. It's just a sketch right now. The next step is to fill in the details.
I know what you're thinking. What about the lights? Well, it might have been easier to cut a hatch of some kind before I added skin, but I chose to wait. It worked out fine, but I don't see why it wouldn't work to cut it out now. For the hatch, I elected to make a sort of flap arrangement on the back of his head. More on this in section 5, "Paint, wiring & light test". |
|
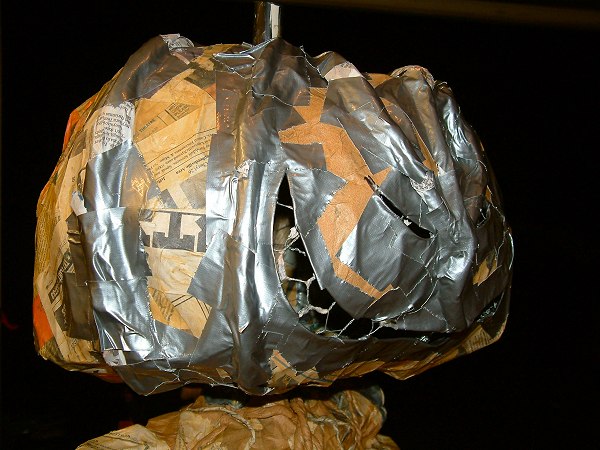
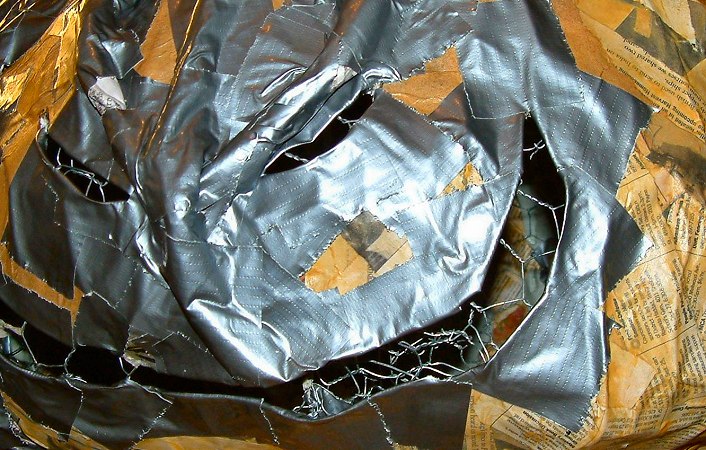
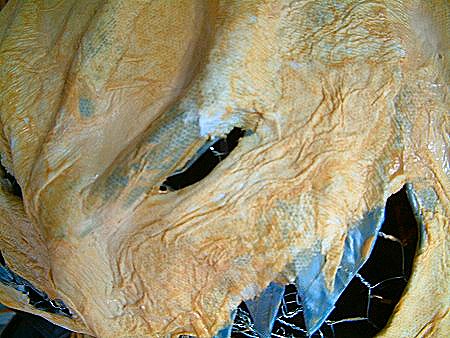
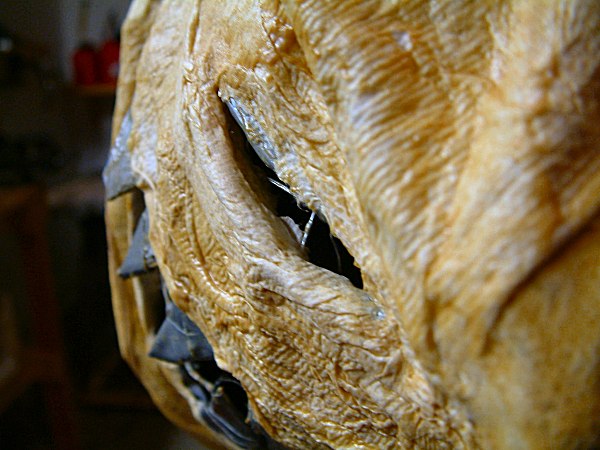
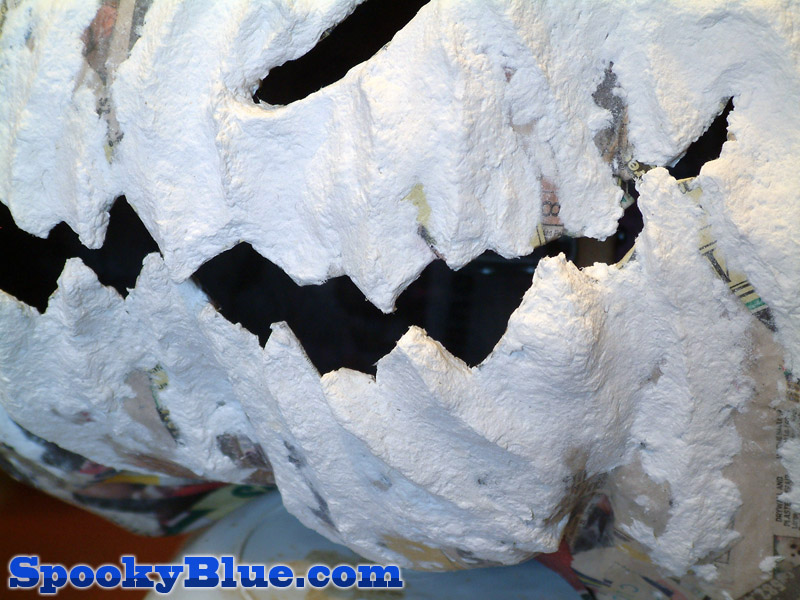
Once the final paper layer was dry, I cut out the eyes and mouth, then began adding other features. If your eye holes seem flimsy, try adding pieces of duct tape and folding them over the edges. This will help firm them up, and will become especially important when you carve out the teeth.
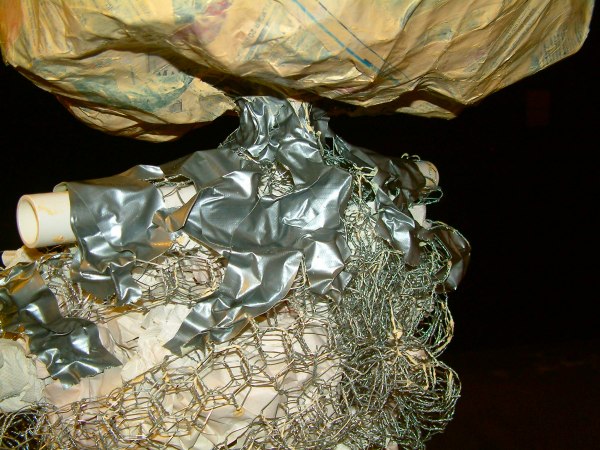
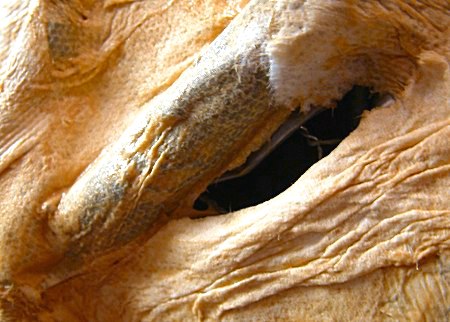
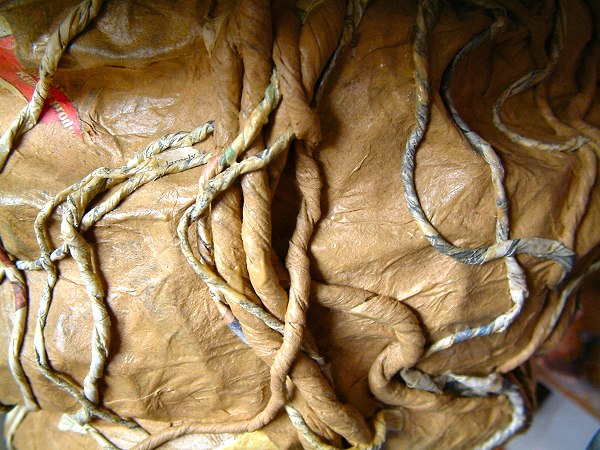
I had originally planned on building features using paper mache pulp, but I was pressed for time so I just rolled up more newspaper and duct taped it down to form horns and ridges. With the silver duct tape, he sort of reminds me of that robot (Box) from Logan's Run. "Overwhelming, am I not?" Over this went a layer of corpsing material for the skin. That's where the shop wipes came into play. If you find the right kind, you can tear them into strips, dip them in glue, and mash them over the paper mache (or duct taped ridges and things) just like you were corpsing a skeleton. Turn any hard edges into smooth curves, bumps, boils, whatever. The wipes are vastly stronger than normal paper towel. If you get the wrong kind, it will take two bulldozers to tear them apart. I have both. I don't, however, have the wrappers anymore, so I don't have a clue what they're called.
Duck tape is fun for making things like bumps and ridges, and I like it a lot. It's a form of sculpting, although it might not seem intuitive to some folks. An alternative to that shiny robot face is to build up all those neat features using paper clay, as is demonstrated in the photos below. For more information on some paper clay basics, take a peek at our Witch Project. |
|
|
|
|
|
|
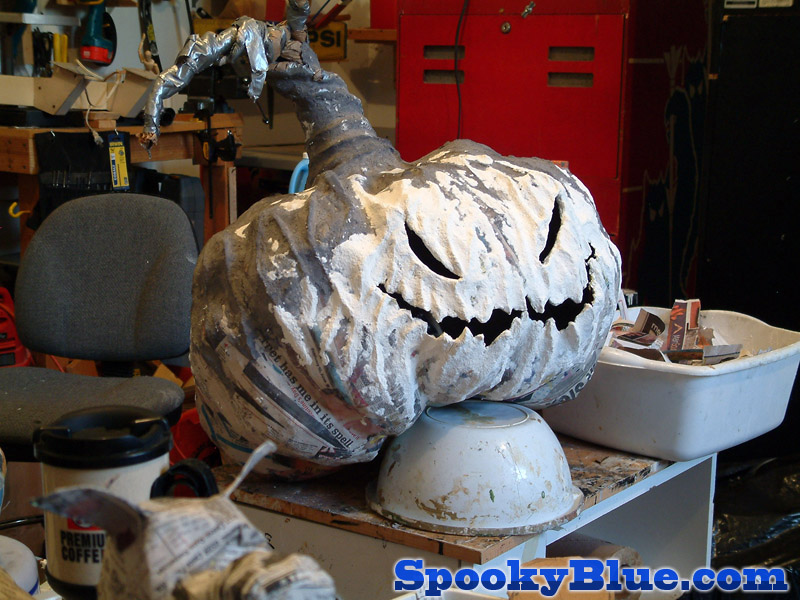
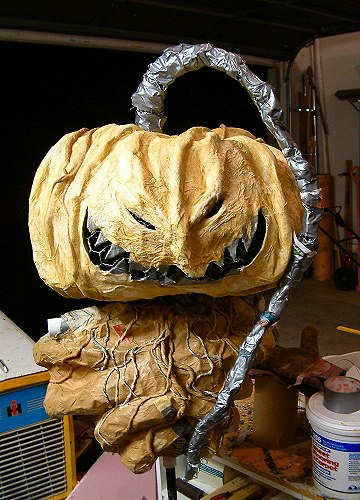
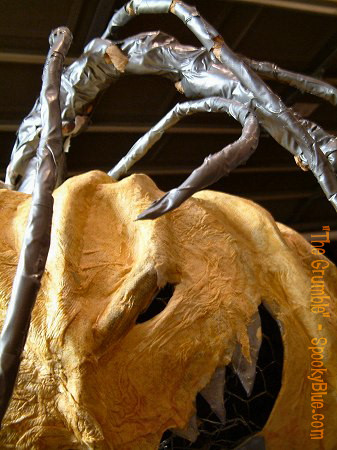
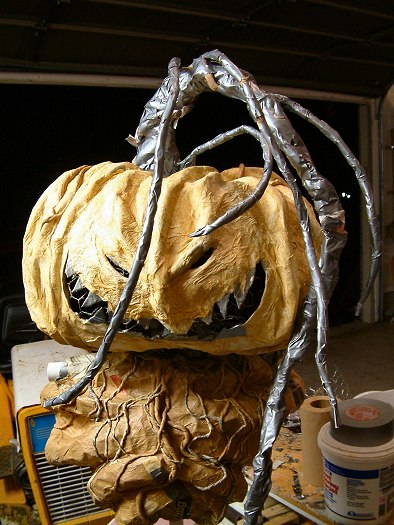
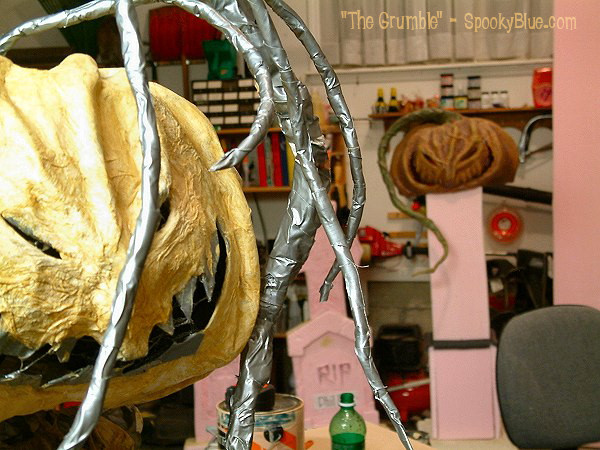
I really overdid the stalk. I figure, to a scarecrow, a thick stalk is like a status symbol. Other, punier scarecrows that drive fast sports cars might be overcompensating. Do feminist scarecrows have stalk envy? Anyway, I rolled more chicken wire (about 5'!), wrapped it in duct tape, and eventually skinned it. The wire is securely fastened to the PVC pipe sticking out of the top of the head. I drilled holes and threaded wire through.
One stalk looked good, so why not lots of them? This is Bruno's son, after all. You know youngsters with their crazy hair styles. The lesser stalks, or vines, are rolled up lengths of brown paper towel (on a roll, the same kind used in public restrooms) wrapped in duct tape. They're of various sizes, sort of a Rastafarian thing.
Bruno's head glared approvingly the whole time. |
|
|
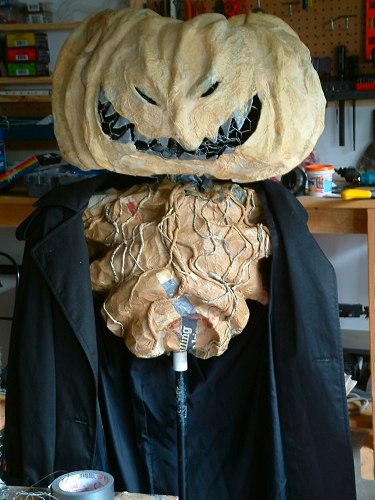
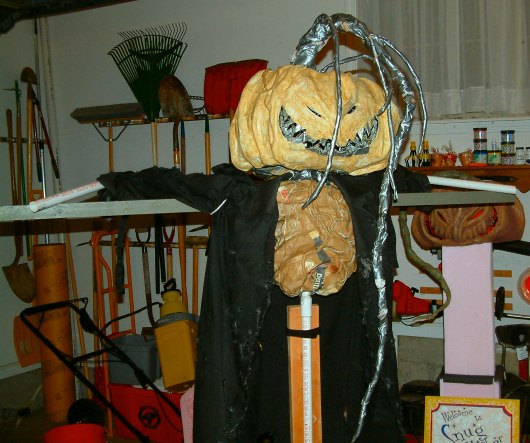
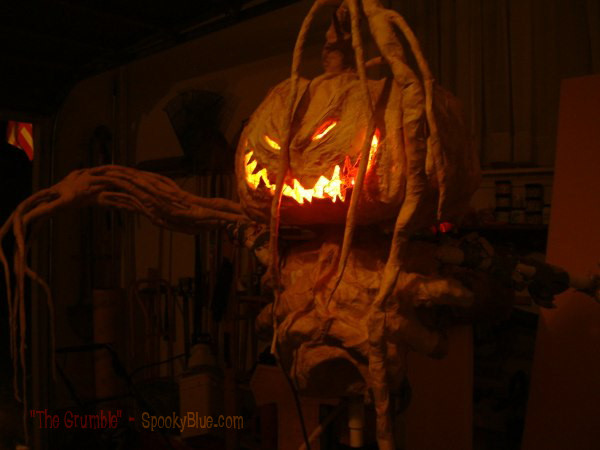
Since this scarecrow is a hybrid, we're navigating uncharted territory here. Part undead monster, part vegetable. I added lots of extra vines that run all up and down the rib cage. This kind of detail work will be lost on spectators who will be more than 5 or 6 feet away, but up close they are pretty gross. He also has long vines extending out of his spine. Yuck. For the arms, each shoulder pipe got a 45 degree angle, a 2' pipe, a 90 degree angle, and another 2' pipe. I tied a 5' long 1x2 to his shoulders to give the impression he was actually hanging from it. Hands came next, but we'll get to that in a minute.
Here is where I screwed up. Remember that he has a PVC pipe extending from the bottom of his torso. I added a coupler, then cemented another length of 3/4" pipe, about 4'. When it came time to set him out, I dug a three foot deep hole. Into the hole went an 8' length of 1.5 " PVC pipe, tamped in nice and tight. I inserted the scarecrow's pipe into the larger one. The top of his head was nearly 10' high, and after I painted the pipe, he looked pretty good. I was uneasy, though, because the pipe tended to bow and sway in the breeze. Had I trusted my instincts, our scarecrow would have been spared the ignominy of ending up face-down in the mud after a hard rain. |
|