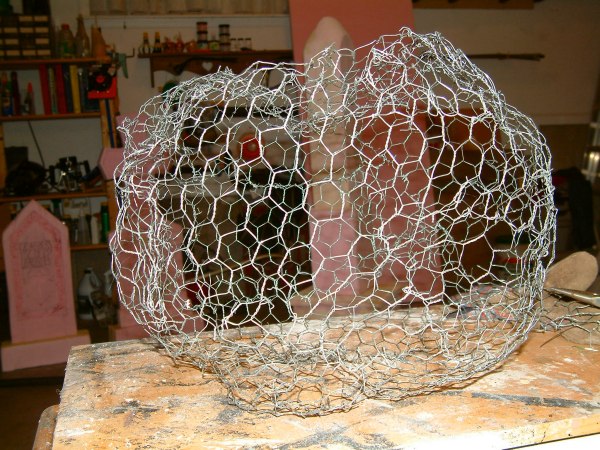
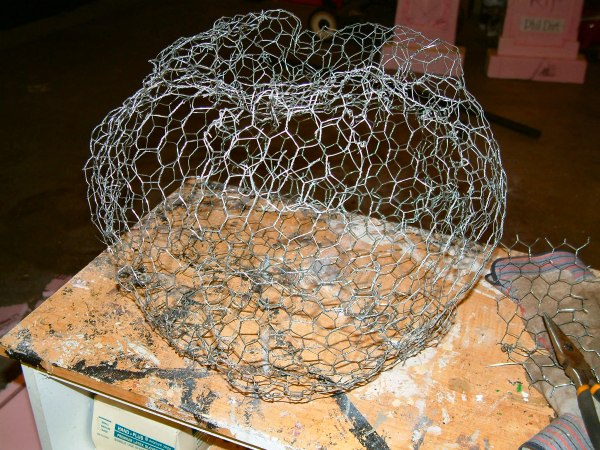
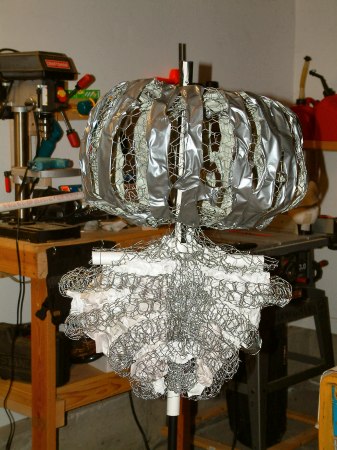
You would think that wadding a bunch of chicken wire into the shape of a pumpkin would be fairly simple, but no matter how I smooshed it, I kept ending up with a cylinder. The answer appeared in a recovered memory from Ms. Pitman's 7th grade social studies class. Remember those maps of the world that looked like a bunch of elongated footballs glued together? If you cut them out, they can be taped together to form a globe. I unrolled my crappy cylinder so it was flat, then cut curved "V" shapes into the top and bottom at intervals. The cylinder could then be easily formed into a more pumpkiny shape.
Observe standard safety procedures for working with chicken wire. All those pointy ends will conspire to draw blood. Wear gloves, or when you're finished you're going to need a can of Neosporin and a tetanus shot.
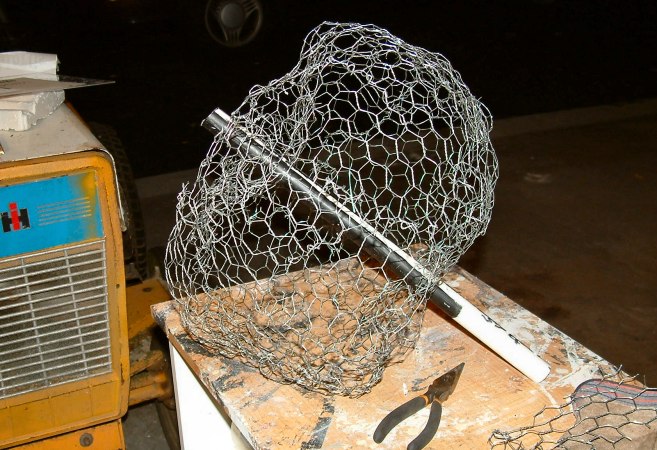
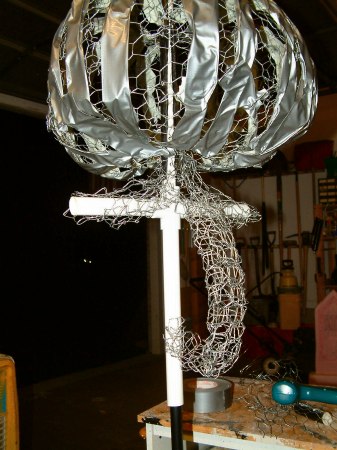
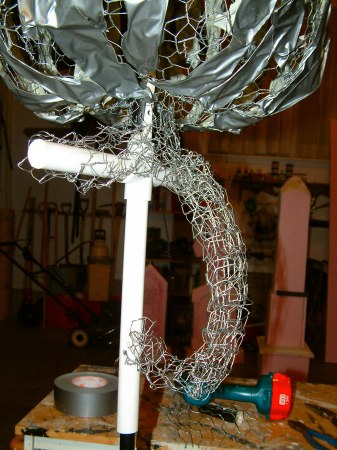
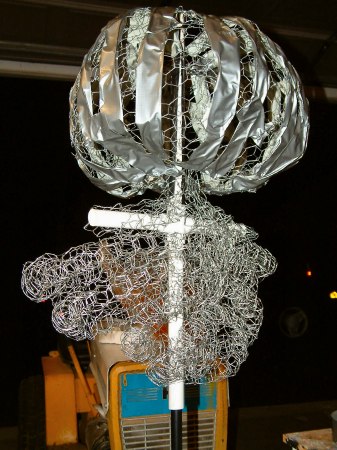
This is a fine looking pumpkin, but it needs extra support so it doesn't collapse under the weight of its skin. I inserted a length of 3/4" PVC pipe through the center, leaving a good 4" at the bottom to serve as a mounting apparatus. On the top I left a couple of inches on which to mount the stalk.
I drilled holes near the top and bottom of the pipe and threaded wire through them, then wrapped the wire into the head so the pipe was firmly attached. When the head is mounted to the shoulders, the pipe will hold all the weight.
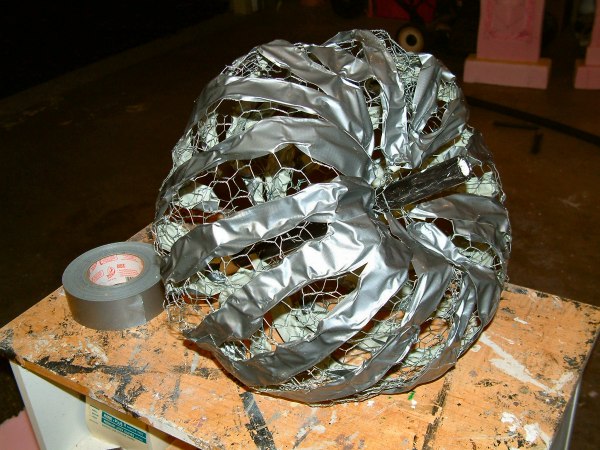
I added lengths of duct tape running from pole to pole, wrapping the tape edges around the wire wherever I could. This would give me more of a surface on which to apply the skin. I considered wrapping the whole thing, but that adds weight, and it wasn't really necessary since there was plenty area for the paper mache work. Besides, I wasn't entirely sure that the tape wouldn't be too slippery for the glue to stick. |
|
|
|
|
| |
| ~ "It sort of looks like how Frankenstein's monster might appear if the planet were populated by Slinkys." |
|
|
| * Aaack! If your chicken wire is reluctant to change form into a pumpkin, don't get discouraged. My first Grumble head didn't turn out perfectly on the first try either. I'm only showing you all the fun, happy, all-you-have-to-do-is-turn-this-metalic-porcupine-into-a-pumpkin kind of stuff. There aren't any pictures of me standing in the middle of my garage, bloodied arms folded, staring at a lump of chicken wire that won't do what I want no matter how much I cuss or threaten it. Take a walk. Come back. Try again. |
|
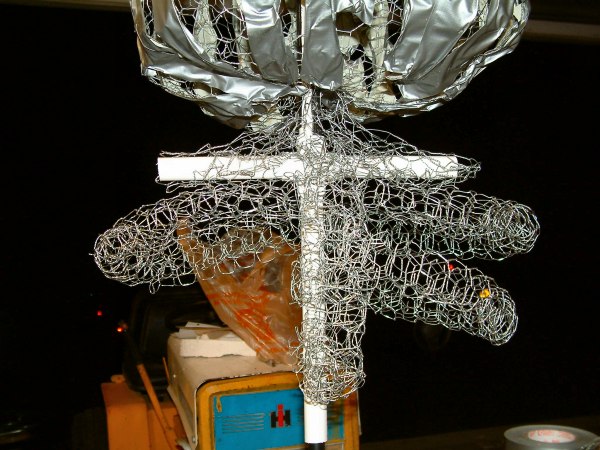
The torso armature consists of about a 2' length of PVC with a 4-way junction on top. The shoulders are two (approximately) 1' lengths of pipe inserted into the sides of the 4-way. I cemented these pieces together, then added the head on top, also cemented. I had to adjust the length of the "neck" by cutting off an inch or so from the south pole of my head pipe. Better to have to cut a little off than to need more length, right?
I rolled about 2.5' of chicken wire to form the "breast bone" and secured the ends to the armature. I drilled holes through the pipe and threaded wire, then secured the breast bone firmly to the vertical pipe. Notice how it is curved. We're following the same procedure as a groundbreaker rib cage made from rolled newspaper. Refer to the link for more information. The ribs are also rolled chicken wire. I elected to use chicken wire instead of newspaper if for no other reason than it would have taken forever to roll that much newspaper. Besides, the wire is lighter.
After the torso wiring was complete, I stuffed it with newspaper. This would make the paper mache work go much more easily by providing lots of surface area to stick to. It sort of looks like how Frankenstein's monster might appear if the planet were populated by Slinkys.
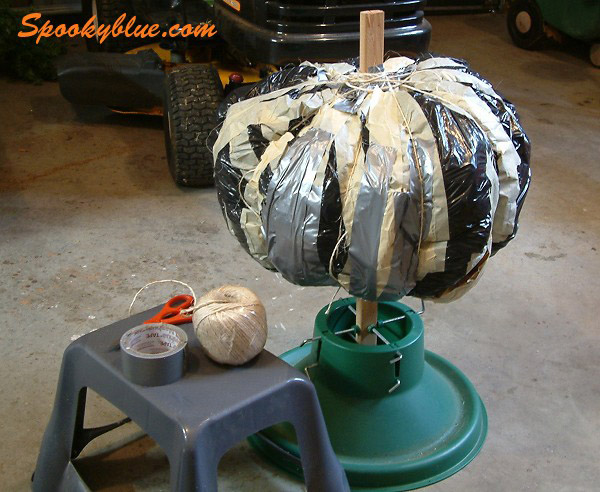
As much fun as flaying all exposed skin with chicken wire sounds, today's more modern Grumble head is made using the Stolloween method. Basically, make a plastic bag look sort of like a pumpkin, Insert a sturdy stick, or piece of PVC, as a center post for later mounting, and you're off. Removing all that chicken wire will make it much lighter, and you may be able to go another 6 months before your next tetanus booster.
- Stuff a plastic garbage bag with newspaper, leaves, credit card offers, whatever.
- Shove a stick (broom handle, 1x2, 2x2, or even a tree branch) through the center so that it protrudes at least 4" from the top and 5"-6" from the bottom.
- Tie string around the bag, loop it around the center post, and cinch it tight to form longitude lines around your pumpkin.
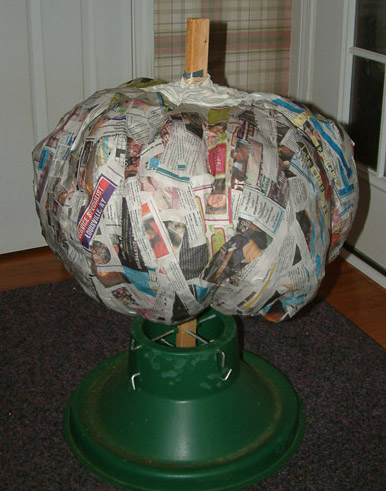
- Cover with several layers of paper mache strips.
- Use paper clay to enhance pumpkiny features.
- When dry, cut a hole in the bottom and remove the innards.
We have discovered that it is better in the long run not to permanently attach a Grumble head to a Grumble torso. If PVC is used for the center post, then a simple coupler should hold it just fine. If you're worried about it falling off, drill a hole through the coupler and apply a set screw to keep it from blowing off in a strong wind.
|
|