Fred |
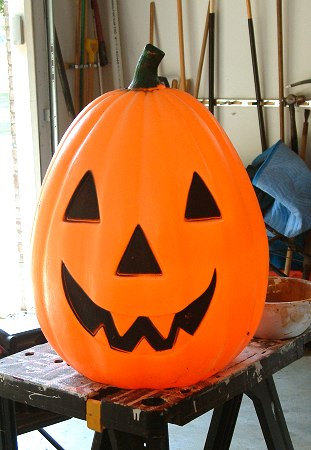
We're doing plain old traditional paper mache work here, but with a couple of twists to help things go smoother and to keep from damaging your armature. You can use anything that's pumpkin shaped. These lamps are fairly easy to come by, and they're already the right size (about 3' tall). Alternatively, you could build a shape out of poultry screen or even a big blob of balloons all wrapped up in plastic wrap. How you're going to cover a writhing mass of balloons with paper mache, though, is anyone's guess. Heh...maybe you could make a giant bunch of evil grapes or something. |
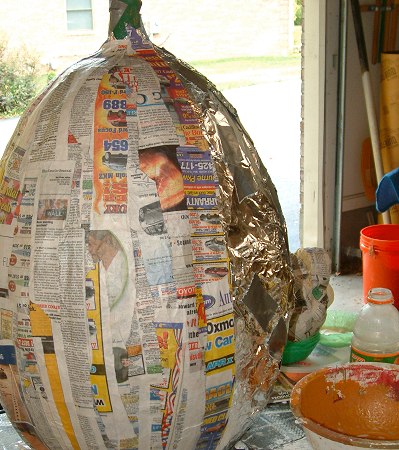
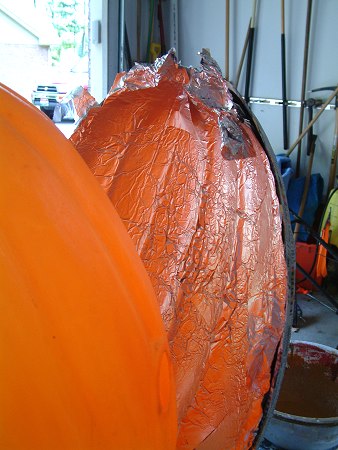
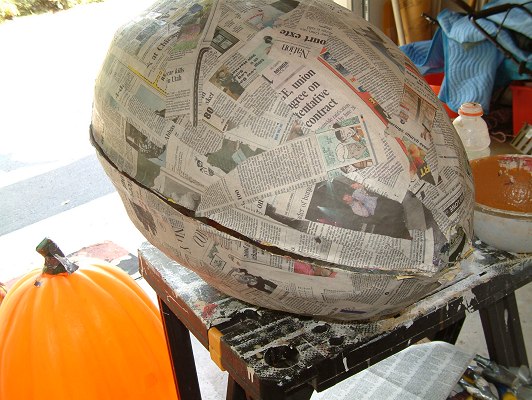
"That grinning glowing globular invader of your living room is an inhabitant of the punkin patch, and if your doorbell rings and nobody's there, that was no Martian. It's Halloween." ~ Orson Welles Step 1 is to cover your armature with something that you can easily peel off later. I've had luck with both plastic wrap and aluminum foil, so try one. If you don't like it, switch to the other. Don't use a lot of tape.Remember, we're covering the object so when it comes time to remove the actual paper mache, it comes right off the armature without any fuss. If you apply paper directly to your armature, it will stick like no glue has ever stuck before, and you'll swear to gawd that you're never ever going to do another one of these stupid Spooky Blue Halloween projects again. |
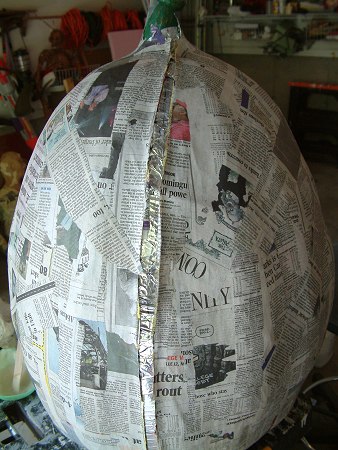
In a large bowl, mix three parts Elmer's glue to one part water. For a single session of paper mache work, I generally use about one cup of glue for my mixture (So, that would be 1cup glue, 1/3cup H2O). Dip three fingers into the glue and apply to both sides of a strip. The exact right amount you'll have to figure out on your own. Too much glue and it won't stick to the armature. Too little glue and you'll have trouble smoothing out the wrinkles. By the way, I wear thin latex gloves during all this. Draw an imaginary line down the center of the pumpkin to divide it into two hemispheres. When you apply paper, don't let the edges of the hemispheres touch. Just build them up individually and leave a small gap between them. By doing this, we avoid having to use a knife or razor to cut the paper away from the armature. This will spare your plastic pumpkin some nasty scarring. Don't be discouraged if your first layer causes you some trouble. The plastic or aluminum foil will probably move around a lot and cause wrinkles. That's okay. Just get the first layer down as best you can and let it dry. Don't even worry about smoothing it out. All the layers after that will be much easier. You'll need to apply at least 7 layers of newspaper in order to achieve enough rigidity for the de-molded pumpkin to stand up on its own. Alternate colors for each layer so you're sure to get good coverage. I used yellow pages from a phone book or sale ads from the newspaper alternated with black and white newsprint. Cover all the way from the base of the stalk to almost the very bottom. Leave a big enough area at the bottom so that you can do some internal work later on. |
|
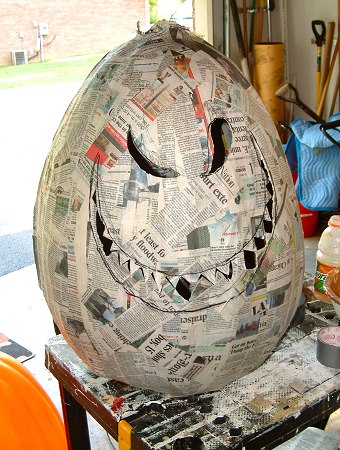
If your hemispheres don't overlap, you should be able to pull them away from the pumpkin with very little effort. It's okay if they became a little deformed and don't match up all that well. Just tape them together from the inside with duct tape as best you can. At this stage, lying on its side, it should sort of look like a mutant walnut. Weld the two pieces together by applying several strips of newspaper to the seams. Be patient and cover the seam completely. Leave a hole at the top for the stalk. After it is strong enough to stand on its own, add some extra bulk around the larger hole on his bottom. I'll let that imagery sink in so you can make your own jokes. |
|
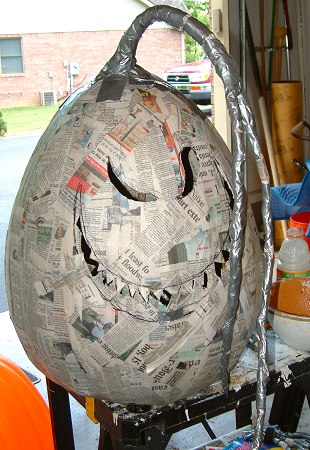
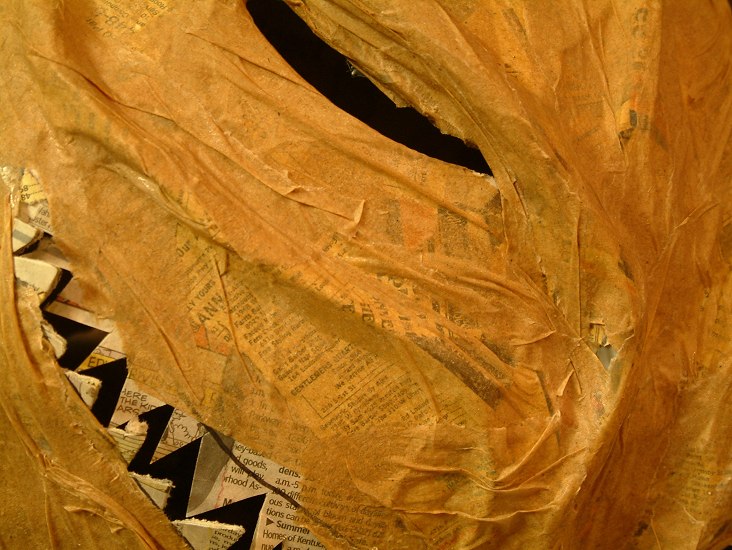
I never really experimented with a gaping wide mouth for these guys, so feel free to try one yourself. Just keep in mind that if you cut a big hole in the middle of his face, the weight of it is going to push down on that hole. This could cause it to collapse. Now we have bad egg. Mean, but still an egg. Let's add a stalk. Roll up your choice of either newspaper or brown paper towel and wrap tightly in duct tape. Insert several inches of stalk into the hole at the top of his head and secure it with duct tape on both sides. For added strength, place a good layer or paper strips on the inside to help hold things in place. Add more paper to form ridges and to camoflage your welding job. |
|
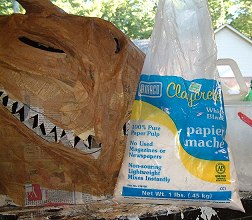
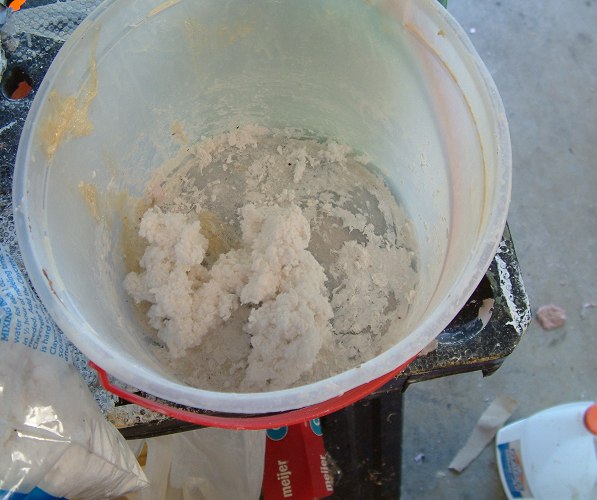
Mix small batches according to package instructions. For building up pumpkiny features, I put about 1.5 cups of pulp in a container, then sprinkle a little (very little) water over it. Don't squeeze it. Just push it around, flip it, let the water soak in. Keep adding water until you have what looks like some seriously dry and lumpy mashed potatoes. |
|
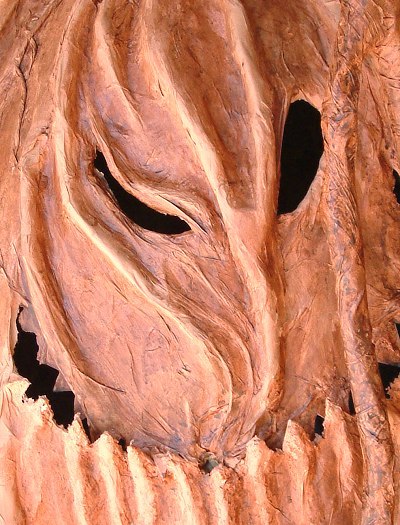
Press the pulp onto your pumpkin to create lumps, boils, ridges, eyebrows, teeth. Grrrr. Go back over your pumpkin with a "skin" layer as if you were corpsing him. For this I like using plain brown paper towel and Elmer's glue. Same solution as what I use to do the paper mache work. After you're happy with your monster's details, it's time to give him a good paint job. I used acryllic paints on Fred here. Start with dark colors and work your way up. Browns, oranges, yellows. Dry-brush highlights with the lightest paints. |
Fred was fun, but just one Moth Brother is like just one Reese cup. You want another. Meet Bob... |